| View previous topic :: View next topic |
| Author |
Message |
Leejo2005
Member

Joined: 12 Jul 2009
Posts: 466
Location: Kennewick
|
 Posted: Tue Mar 16, 2010 5:07 pm Post subject: Update Posted: Tue Mar 16, 2010 5:07 pm Post subject: Update |
 |
|
So this weekend I started my engine swap for the Firebird. I got the engine, harness, transmission, rear end, rear suspension and fuel tank removed. Having all of that old junk out of the way I cleaned the crap out of the underside of the car and engine compartment. Now I'm just waiting on some new paint to spray under the hood before installing the new engine. I also took the time to clean, de-rust, and paint the rear end and 5 speed. I'm currently waiting on a new filler next for my new fuel tank unless someone here has any tips on removing the old one from the old tank.
As soon as I can get a new filler neck I plan on reinstalling the fuel tank so I can put in my new shocks and spohn rear suspension so the car can sit on 4 tires again. Then of course I'll get a few friends to help me drop in the new motor. Not that I'm not capable of doing it by myself but I'd rather not scratch up anything or break stuff on my pretty new motor. I can't wait to see what this polished tpi looks like on it either. With any luck within the next two weeks I'll have it fired up and won't have to drive the pos SHO any longer.
- J-bone |
|
| Back to top |
|
 |
aaron_sK
Member
Joined: 23 Jan 2006
Posts: 8834
Location: Back in beautiful Tacompton
1987 Chevrolet Camaro IROC-Z
|
| Posted: Tue Mar 16, 2010 5:26 pm Post subject: |
|
|
| Take the tank to a local radiator shop. They should be able to fix the neck for you for a few $$$. |
|
| Back to top |
|
|
blue89
Member

Joined: 23 May 2006
Posts: 3482
Location: Bellingham/Eugene
1986 Chevrolet Camaro RS
|
|
| Back to top |
|
|
iansane
Member

Joined: 16 Jan 2004
Posts: 5742
Location: Bothell
1991 Pontiac Trans Am
|
| Posted: Tue Mar 16, 2010 8:25 pm Post subject: |
|
|
| blue89 wrote: | Just weld it  I got a two part epoxy from the parts store made for repairing tanks. It's worked for 3 years so far..... I got a two part epoxy from the parts store made for repairing tanks. It's worked for 3 years so far..... |
This just in; Everett man vaporized in freak welding explosion. Attempted to defy the laws of thermodynamics. |
|
| Back to top |
|
|
cameron7710
Member

Joined: 13 Apr 2008
Posts: 813
Location: shoreline,Wa
1992 Chevrolet Camaro RS
|
| Posted: Tue Mar 16, 2010 9:02 pm Post subject: |
|
|
| iansane wrote: | | blue89 wrote: | | Just weld it I got a two part epoxy from the parts store made for repairing tanks. It's worked for 3 years so far..... |
This just in; Everett man vaporized in freak welding explosion. Attempted to defy the laws of thermodynamics. |
psh...
http://www.youtube.com/watch?v=tD4KiQEnxwQ
_________________
 |
|
| Back to top |
|
|
Quasi-Traction
"I have petals"

Joined: 24 Oct 2005
Posts: 3873
Location: stumptown
1986 Chevrolet Camaro Berlinetta
|
| Posted: Tue Mar 16, 2010 9:03 pm Post subject: |
|
|
Crazy Canadians.

_________________
 |
|
| Back to top |
|
|
blue89
Member
Joined: 23 May 2006
Posts: 3482
Location: Bellingham/Eugene
1986 Chevrolet Camaro RS
|
|
| Back to top |
|
|
Spikeophant
Member
Joined: 12 Mar 2010
Posts: 164
Location: Bend, Oregon
1986 Chevrolet Camaro IROC-Z
|
| Posted: Wed Mar 17, 2010 6:27 am Post subject: |
|
|
I've welded gas tanks before, just flush it out with water first, and leave a bit in the bottom....
_________________
1986 Camaro Z-28 IROC-Z 350 swap |
|
| Back to top |
|
|
Leejo2005
Member
Joined: 12 Jul 2009
Posts: 466
Location: Kennewick
|
| Posted: Thu Mar 18, 2010 4:38 pm Post subject: |
|
|
| I just want to figure out how to get the filler neck out of my old tank so I can put it in the new tank. (swapped tanks only for compatibility with fuel injection and larger capacity) |
|
| Back to top |
|
|
Leejo2005
Member
Joined: 12 Jul 2009
Posts: 466
Location: Kennewick
|
| Posted: Sat Mar 20, 2010 1:56 pm Post subject: |
|
|
Ok, so I got a welder to remove the filler neck from my old tank. It was fixed using silver-solder. It is not TIG welded in place because he didn't have any silver solder. Hopefully I'll never have to take it out ever again.
I have now removed everything from the engine compartment except the crossmember. I had some light royal blue paint mixed up at the local paint shop. I'm going to spend the day sanding her down and getting ready to paint. |
|
| Back to top |
|
|
iansane
Member
Joined: 16 Jan 2004
Posts: 5742
Location: Bothell
1991 Pontiac Trans Am
|
| Posted: Sat Mar 20, 2010 5:03 pm Post subject: |
|
|
Sweet! Progress is good. Any pictures?
_________________
| Quote: | | Sometimes I actually think I'm slightly retarded in the mouth. |
|
|
| Back to top |
|
|
Leejo2005
Member
Joined: 12 Jul 2009
Posts: 466
Location: Kennewick
|
| Posted: Sun Mar 21, 2010 5:43 pm Post subject: |
|
|
| I got the rear end in, the fuel tank in and wired up. I apologize for the bad image quality, my phone sucks. |
|
| Back to top |
|
|
Red Bird
Member
Joined: 28 Jun 2005
Posts: 195
Location: Yakima
1991 Pontiac Firebird
|
| Posted: Sun Mar 21, 2010 7:34 pm Post subject: |
|
|
Looks good! what type of paint/prep work did you do to your differential.
_________________
1991 Firebird L03 T-5 |
|
| Back to top |
|
|
blue89
Member
Joined: 23 May 2006
Posts: 3482
Location: Bellingham/Eugene
1986 Chevrolet Camaro RS
|
|
| Back to top |
|
|
RSFreak
The other "John"

Joined: 23 Jan 2004
Posts: 2946
Location: Renton
1989 Chevrolet Camaro RS
|
| Posted: Sun Mar 21, 2010 8:31 pm Post subject: |
|
|
I like this quote from the youtube video:
"you are dangerous and will die a stupid death"
_________________
'86 Trans Am - 5.0L TPI - LT1 cam - 700R4 - WS6
'85 Camaro Berlinetta - IROC clone
 |
|
| Back to top |
|
|
Leejo2005
Member
Joined: 12 Jul 2009
Posts: 466
Location: Kennewick
|
| Posted: Sun Mar 21, 2010 10:09 pm Post subject: |
|
|
As far as the paint prep, I just took it home, scraped off as much of the grease, oil and dirt as I could. Sprayed it with degreaser, scrubbed it with a plastic brush. Pressure washed it, repeating until there wasn't any grease left. Then I wirebrushed the crap out of it. Finally I cleaned it with grease and wax remover.
I just used some good old rustoleum to paint it. I've done it before and had it work out pretty good. If I cared enough I might have sent it out for power coating or something, but that would be in a dream world for me. I really just took the thing out to access the fuel tank. It was just hard for me to put it back in after all the work of taking it off. I also took the opportunity to replace my control arms, panhard bar, and shocks, I still have to align everything but it's Sunday and I wanted to get home and watch "Life" and eat some pizza.
I'm not getting too insane with this because I doubt I'll break anything in the rear with a TPI 305.
...having said that someone is going to reply about how they blew their's with 305. |
|
| Back to top |
|
|
flea
Member

Joined: 25 Jul 2008
Posts: 1246
Location: Raymond WA
1991 Chevrolet Camaro RS
|
| Posted: Mon Mar 22, 2010 7:38 am Post subject: |
|
|
| Leejo2005 wrote: | | ...having said that someone is going to reply about how they blew their's with 305. |
No, but my 305 blows.
_________________
Killing mailboxes since 2009 |
|
| Back to top |
|
|
Dewey316
The Lama

Joined: 08 Jan 2004
Posts: 7295
Location: Bringing the tech
1990 Chevrolet Camaro RS
|
| Posted: Mon Mar 22, 2010 8:21 am Post subject: |
|
|
| You should be fine with it, as long as you don't grab sudden traction. Keep the drag radials off it, and you should be alright. |
|
| Back to top |
|
|
Leejo2005
Member
Joined: 12 Jul 2009
Posts: 466
Location: Kennewick
|
| Posted: Sat Mar 27, 2010 3:49 pm Post subject: |
|
|
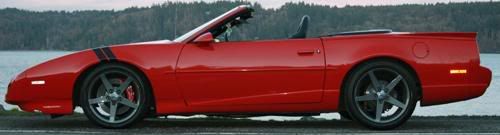
| Some more pictures from today. |
|
| Back to top |
|
|
Leejo2005
Member
Joined: 12 Jul 2009
Posts: 466
Location: Kennewick
|
| Posted: Tue Mar 30, 2010 9:04 am Post subject: |
|
|
| More! Should have her running today. |
|
| Back to top |
|
|
|