| View previous topic :: View next topic |
| Author |
Message |
aaron_sK
Member
Joined: 23 Jan 2006
Posts: 8834
Location: Back in beautiful Tacompton
1987 Chevrolet Camaro IROC-Z
|
 Posted: Thu Aug 01, 2013 8:56 pm Post subject: Part 7: These are speed holes, they make the car go faster Posted: Thu Aug 01, 2013 8:56 pm Post subject: Part 7: These are speed holes, they make the car go faster |
 |
|

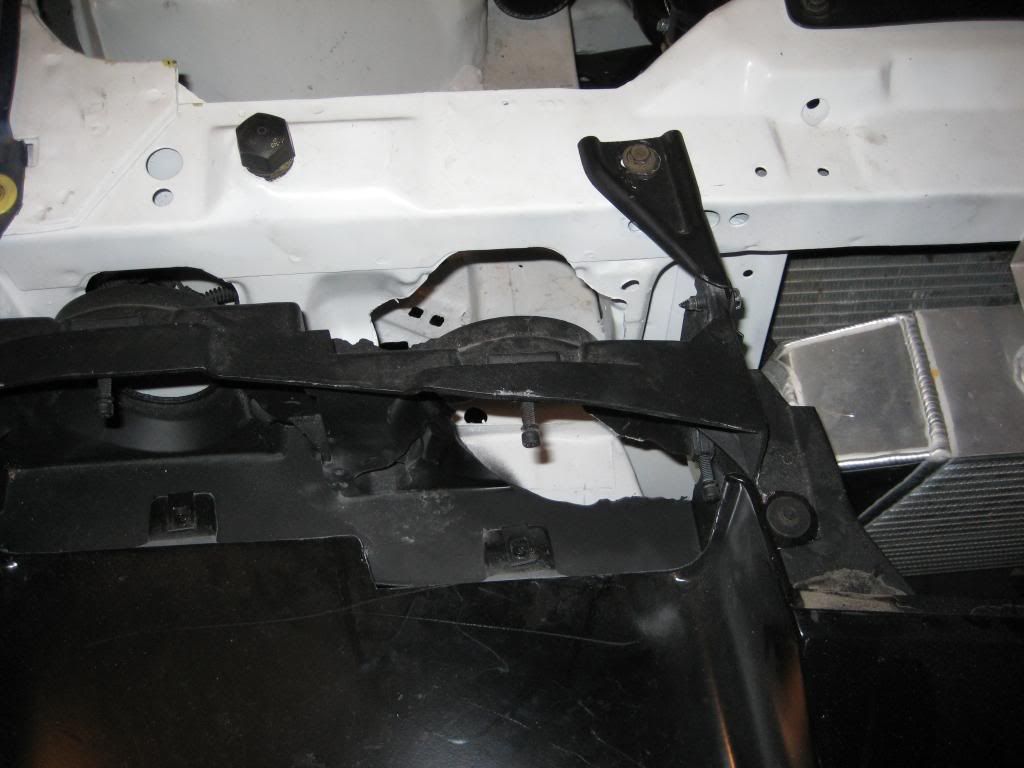
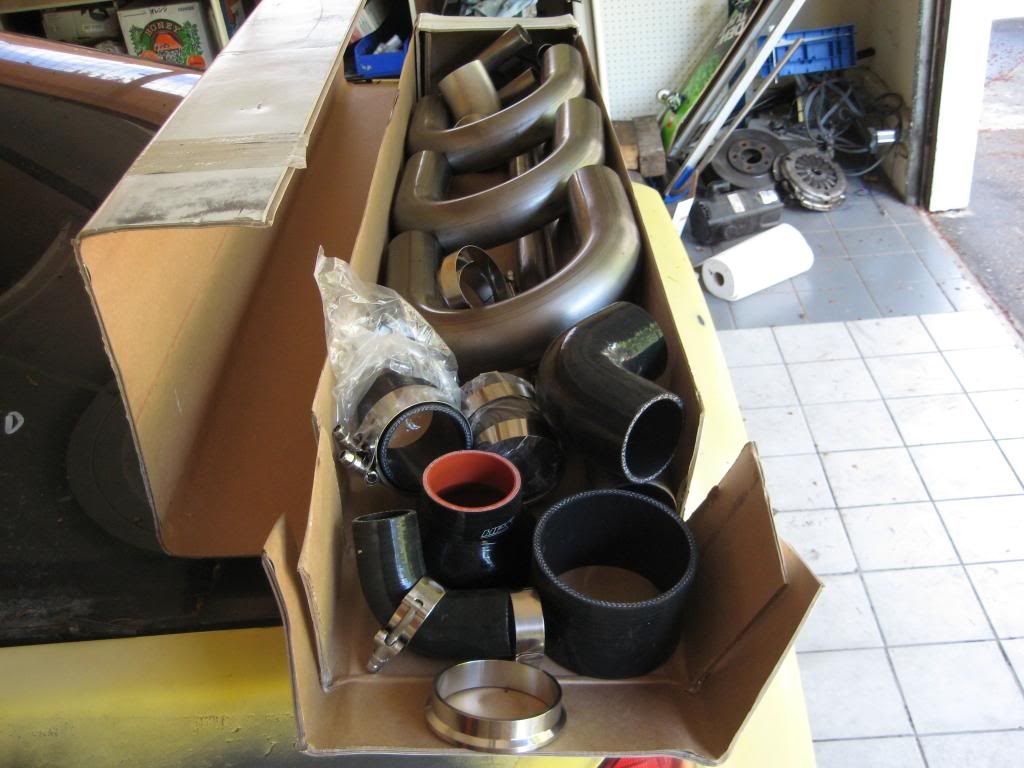
Got home early today and got a wild hare to work on the Camaro a bit. Started by clearancing the core support for the intercooler piping. When I put the headlight bar back on I realized that it interfered as well, so out came the RotoZip.
As we have learned in the past, RotoZip makem good speed holes. 
Unfortunately the headlight bar is made out of some horrible high-density fiberglass crap. Mountain Man no likey. 
I also built another hood latch out of the one Andy gave me. It's identical in design to the old one, but I was not drunk off my ass this time so the cuts are square.  
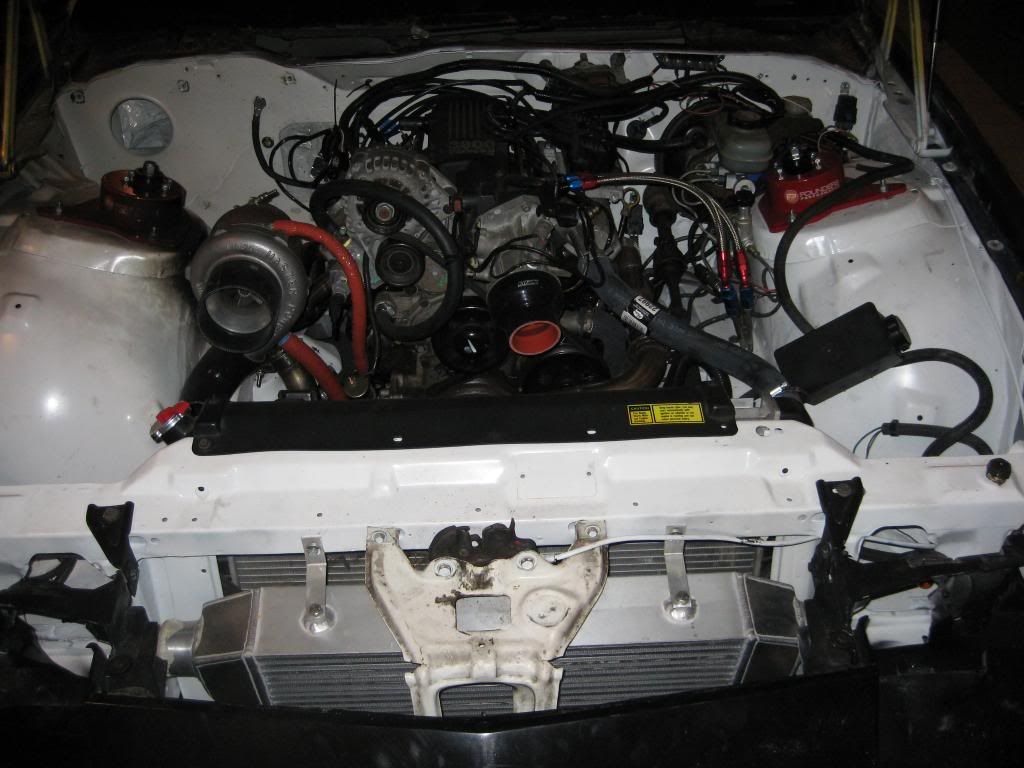
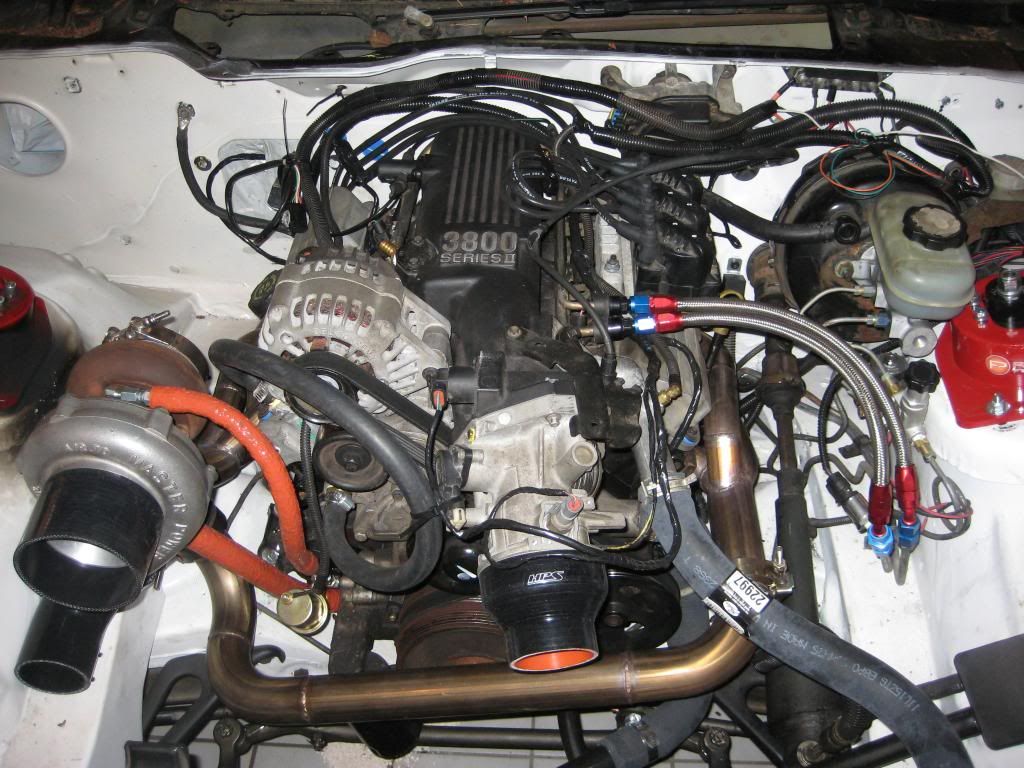
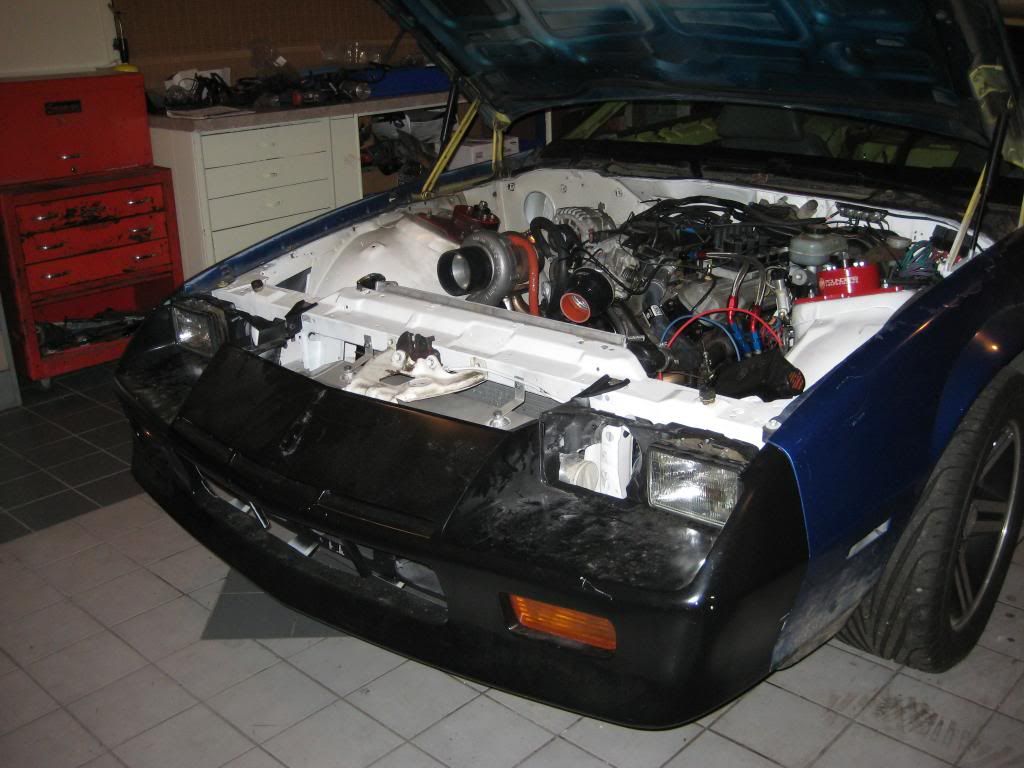
I haven't posted any recent pics of the engine bay, so there you go! 
While I was at it I dumped all the pictures in the camera onto the hard drive. There were some pictures that I took last summer when I was rewiring this thing before Gabe and I got it running. These start sequentially from sometime around June of last year...
-MAF hole gets recycled:
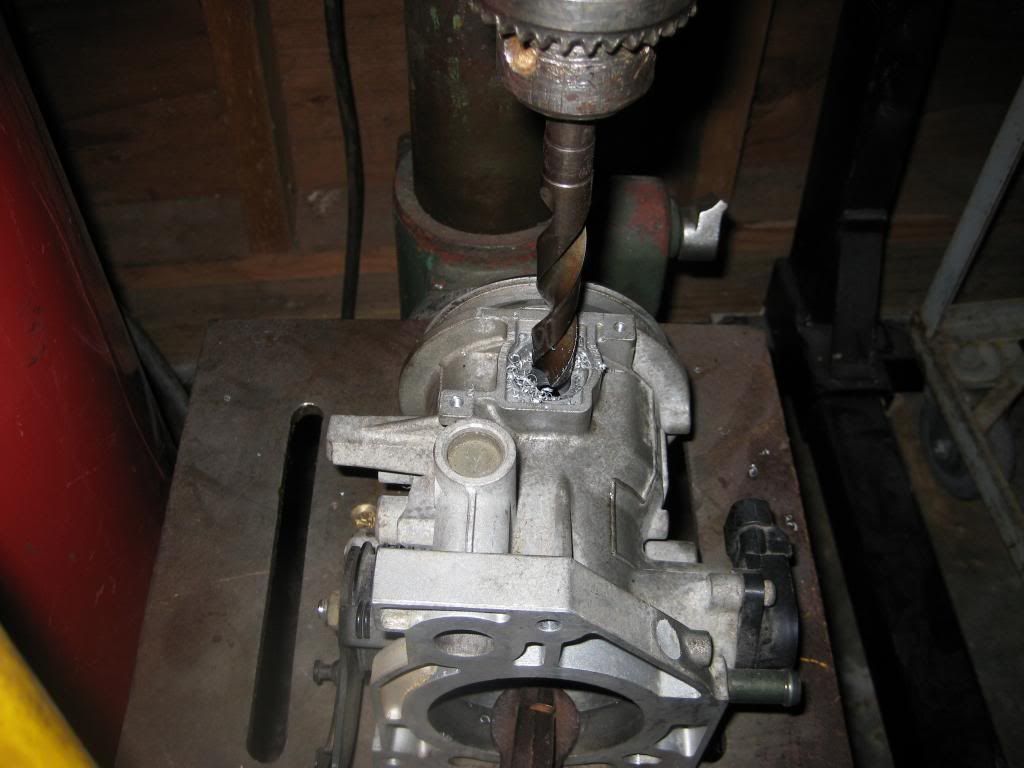
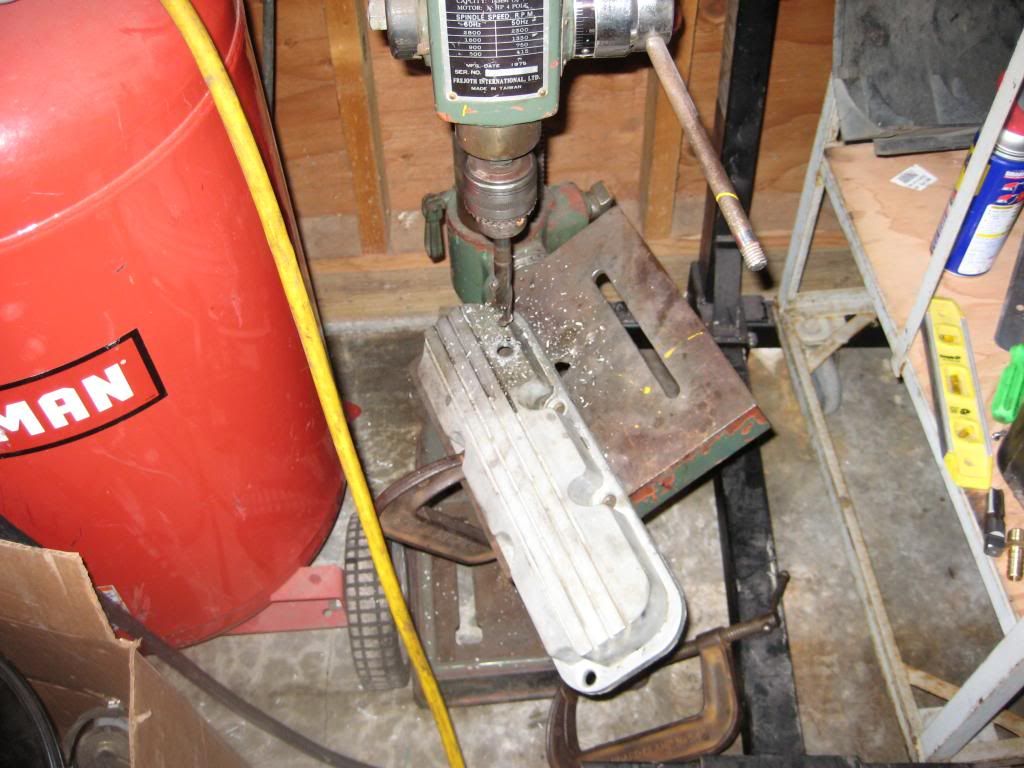
The RWD 3800 throttle body has a built-in MAF sensor with a pillar cast into it to divert air into the sensor. The pillar had already met it's fate in another topic but I still had the hole in the top. ZZP sells a blockoff plate, but why spend money? Why not be both cheap and clever?

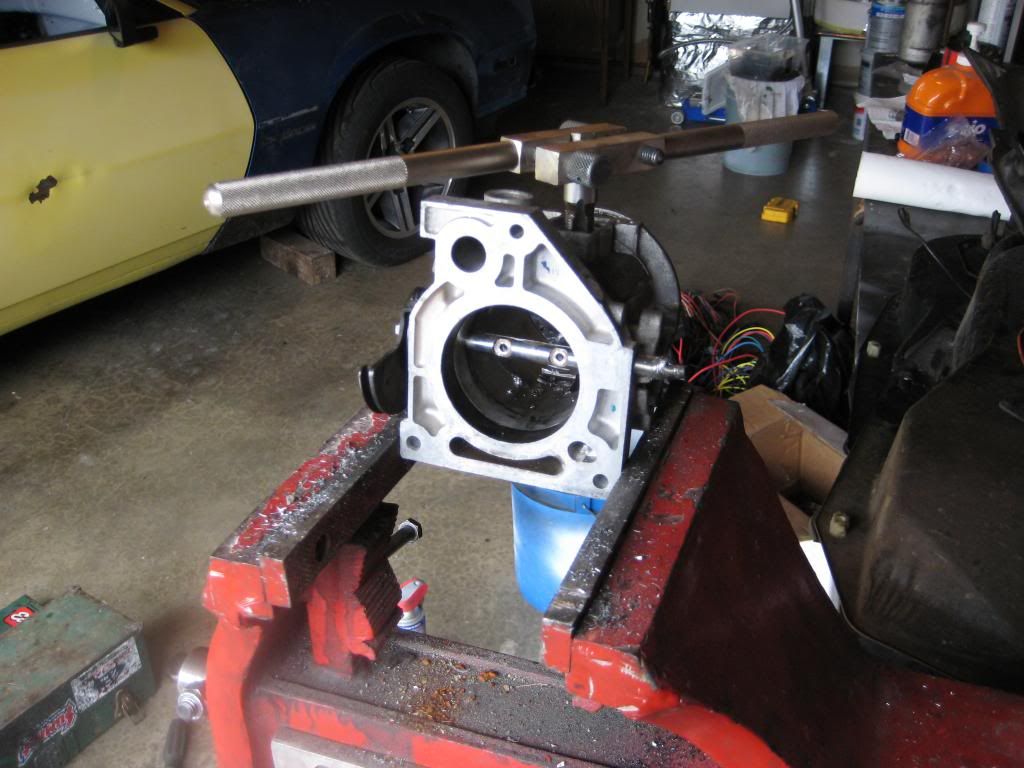

Hard to see, but in that last picture there is an open-element intake air sensor where the MAF once was.
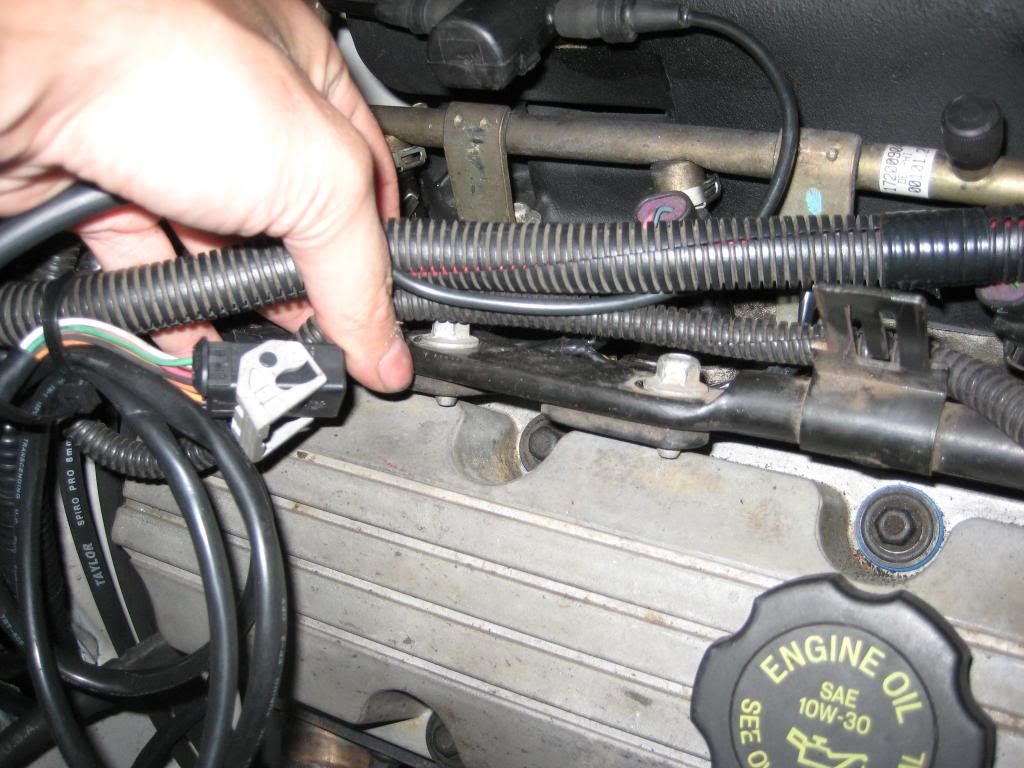
-Crank vent:
GM had a goofy crank vent on the 3800 S2. It was entirely internal, with no outside piping. Even the PCV valve itself was inside the intake manifold. The fresh air intake was from a port in the throttle body just ahead of the butterfly. Obviously with the boosted application this would have ended poorly, so I blocked off the fresh air port. That meant I had to add an external air intake. I traced the fresh air line through the intake manifold and head and found that it ended in the driver's side head just above the #1 cyl. So that's where I figured I would put my vent:
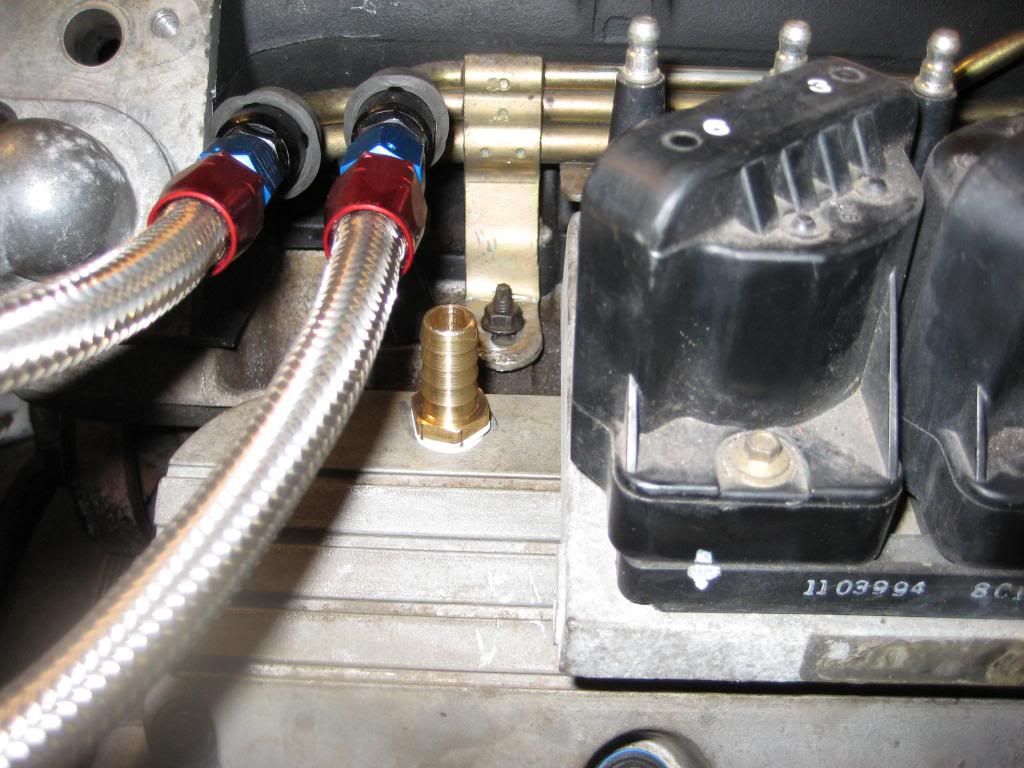
The last picture makes it look like it's under the fuel lines, but it is merely an optical illusion. I will run a line up a bit and into a breather. The draw side of the PCV system will have a catch can and be routed somewhere, probably a slash pipe or something. You can tell I'm all about specific on this build.
-Battery cables:
Sticking with the built-not-bought theory here is some 1ga wire being made into battery cables.
Three grounds and one lead:
The terminal ends, flux and solder pellets came from Waytek, the cable is welding wire from Pacific Welding Supply in Tacoma. I could have gone to 1/0 wire, but decided it was unneeded.
The battery is grounded to the chassis (via a stud stolen from a spare 3800 and screwed into a seat belt mounting hole). The first ground strap goes from the passenger head (at the same point where the MegaSquirt and all ECM sensors ground) to the firewall. The second strap goes from the starter body to the framerail. I did this to ensure easy starting and good ECM ground. So far it works fantastically.
-Starter relay:
I hate GM starter solenoids. They fail on you at the worst time. In an attempt to outsmart this I installed a relay for the solenoid.
The large ring goes to the battery stud on the starter, the smaller ring to the solenoid trigger. One side of the relay coil is grounded to the firewall, the other side goes to the ignition. This ensures that the solenoid sees maximum voltage. If you are considering a Ford fender-mounted solenoid to cure a clicking GM solenoid then I suspect this may be a better solution.
-Alternator wiring:
Not much to say about this. Trigger with resistor, sense wire, and fat feed for the CS130D:
-Wiring:
Bussman multipurpose 3-buss fusebox. I love this thing.
A quick pic of proper weatherpack disassembly. This is the gauge harness Paul built for his Autometer swap. It would have worked great if I was reusing the stock dash harness, but for this custom job I rewired them. Doing it this way allowed me to reuse the connectors and wiring.
-Spohn torque arm bolts:
The plates on the Spohn arm are much thicker than the GM version. This means that the top-locking nuts on the factory bolts will never bite, so longer ones are needed. I don't think Spohn ever bothers to tell anyone this, but it's been awhile since we installed this arm in Gabe's car, so I don't remember.
Regardless, this here is nearly twenty of your American dollars worth of locking grade-8 hardware:
That should bring everyone about up to date, and get rid off all these build pictures I've been meaning to post.
Moving forward, here's a random start and idle video from a week or two ago when I was checking the turbo oil lines for leaks:

It must be Paul's birthday... 
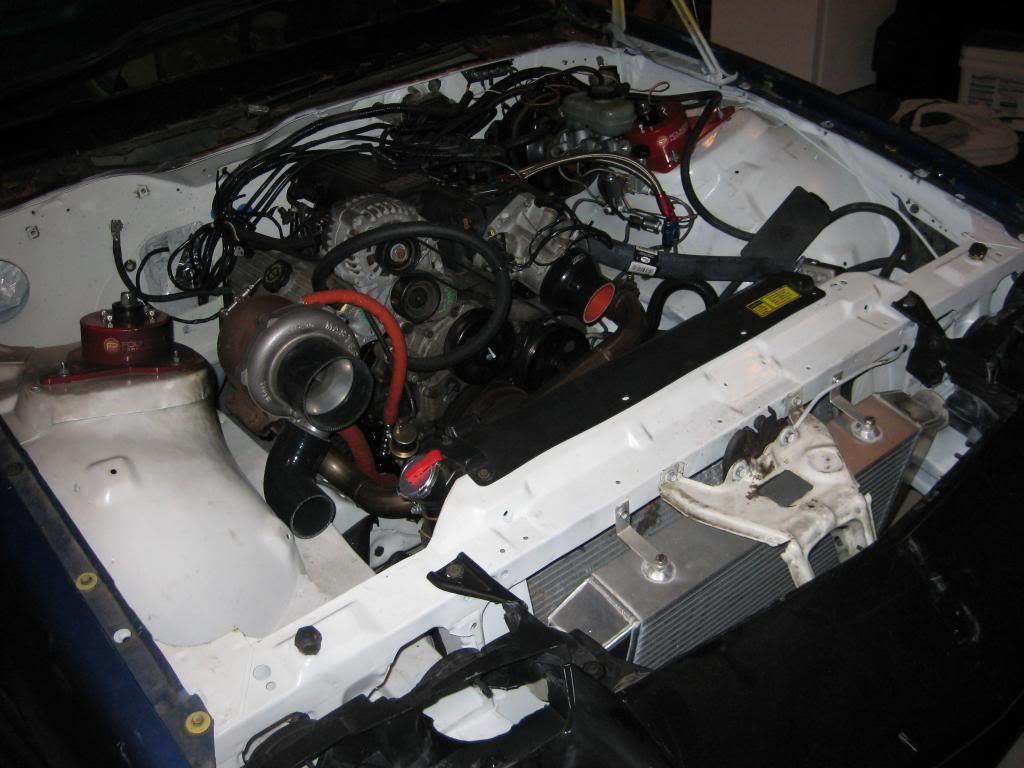
One more parting engine bay shot...
And a reminder to someone that the sooner they bring their Berlinetta over to my shop for an electric fan swap the sooner I can put the proper shroud in this one and get the Taurus fan mounted up!  |
|
| Back to top |
|
 |
Alphius
Peanut

Joined: 05 Sep 2006
Posts: 2429
Location: Grand Mound
1984 Chevrolet Camaro Z/28
|
| Posted: Fri Aug 02, 2013 6:29 am Post subject: |
|
|
Spohn are indeed a-holes who respectfully neglect to mention that stock bolts are a no-go. We made a quality unexpected trip to Ace to buy bolts when we put that thing in my car.
Make 'er street legal and decently stealthy so it looks like we're driving a beater (but legal!) thirdgen around when we are tuning instead of doing massive 3rd gear boost brodies down paved roads in a rolling moving violation.
Still got room for the inside headlights on there or are we gonna save weight and blank those holes out and run the outside beams only?
_________________
84 Camaro Z28 - LS1/T56
85 Silverado - Low and Slow |
|
| Back to top |
|
|
91RSVert
Member
Joined: 16 May 2007
Posts: 2736
Location: AR
1991 Chevrolet Camaro RS
|
| Posted: Fri Aug 02, 2013 12:12 pm Post subject: |
|
|
I re-used stock bolts on my spohn. Been that way for about 10 years.
_________________
2008 GMC Z71
1991 Camaro RS Vert
1972 Jimmy 4x4
20ft Longhorn Car Hauler
 |
|
| Back to top |
|
|
aaron_sK
Member
Joined: 23 Jan 2006
Posts: 8834
Location: Back in beautiful Tacompton
1987 Chevrolet Camaro IROC-Z
|
| Posted: Fri Aug 02, 2013 2:28 pm Post subject: |
|
|
| Alphius wrote: | | Make 'er street legal and decently stealthy |
Is this your way of saying I should paint it because you don't want to be seen in a car that is six different colors?
| Alphius wrote: | | Still got room for the inside headlights on there or are we gonna save weight and blank those holes out and run the outside beams only? |
Hard to say. There is a lot of room between the headlight bar and the headlight bucket, and the bucket itself could be clearanced for more room before you actually get into the body of the light. Worst case we run it Thunderbolt style.
Ironically long ago I had strongly considered deleting the high beams and doing a true CAI on my IROC. But that would have just been silly, TPI doesn't need any air. 
| 91RSVert wrote: | | I re-used stock bolts on my spohn. Been that way for about 10 years. |
Got a pic of the nut engagement? I am very curious to see how it has worked for you when I have had issues on two different cars.  |
|
| Back to top |
|
|
91RSVert
Member
Joined: 16 May 2007
Posts: 2736
Location: AR
1991 Chevrolet Camaro RS
|
| Posted: Sat Aug 03, 2013 12:44 pm Post subject: |
|
|
| No pics right now. I think they are flush, or sunk 1-2 threads. I know I questioned it when I put it in the first time. Drove on it a year or two. Pulled out and put it on the "new" car. Had it on for a year or two, pulled back off when I changed rear axles. Now its been on 4+ years, no issues. |
|
| Back to top |
|
|
fiveoformula
Member

Joined: 08 Aug 2007
Posts: 1799
Location: OR
1988 Pontiac Formula
|
| Posted: Fri Aug 09, 2013 12:31 pm Post subject: |
|
|
The ol' bananna is coming along looks like. Any power predictions yet?
_________________
'88 FORMULA |
|
| Back to top |
|
|
Alphius
Peanut
Joined: 05 Sep 2006
Posts: 2429
Location: Grand Mound
1984 Chevrolet Camaro Z/28
|
| Posted: Sat Aug 10, 2013 11:21 am Post subject: |
|
|
Power = More than enough to break things. 
_________________
84 Camaro Z28 - LS1/T56
85 Silverado - Low and Slow |
|
| Back to top |
|
|
aaron_sK
Member
Joined: 23 Jan 2006
Posts: 8834
Location: Back in beautiful Tacompton
1987 Chevrolet Camaro IROC-Z
|
| Posted: Sun Aug 11, 2013 8:27 pm Post subject: |
|
|
| fiveoformula wrote: | | Any power predictions yet? |
Haha... hard to say. I have seen as little as 300 and as much as 540 with similar combos. All comes down to tuning and design of course. I would be perfectly happy if I could get this half-assed hoopty in the 400-450 range. Bear in mind that this engine is 100% stock except for fasteners and gaskets!
Honestly, with the T70 and the huge intercooler I'm not predicting any lack of peak numbers, I'm more worried that it will have a power curve like a Supra and be no fun on the street. 
That's of course also assuming the Walbro in-tank can keep up, and that the stock T5 holds together, and... umm... what he said:
| Alphius wrote: | | Power = More than enough to break things. |
I sort of got bogged down this weekend I was busy with other projects and there was an unusual amount of annoying nonsense from the car, but progress continues!
This look shiny and expensive.

What's the first thing to do with an expensive OEM part? Why start hacking it up of course!
Yup! Hacking it all up.
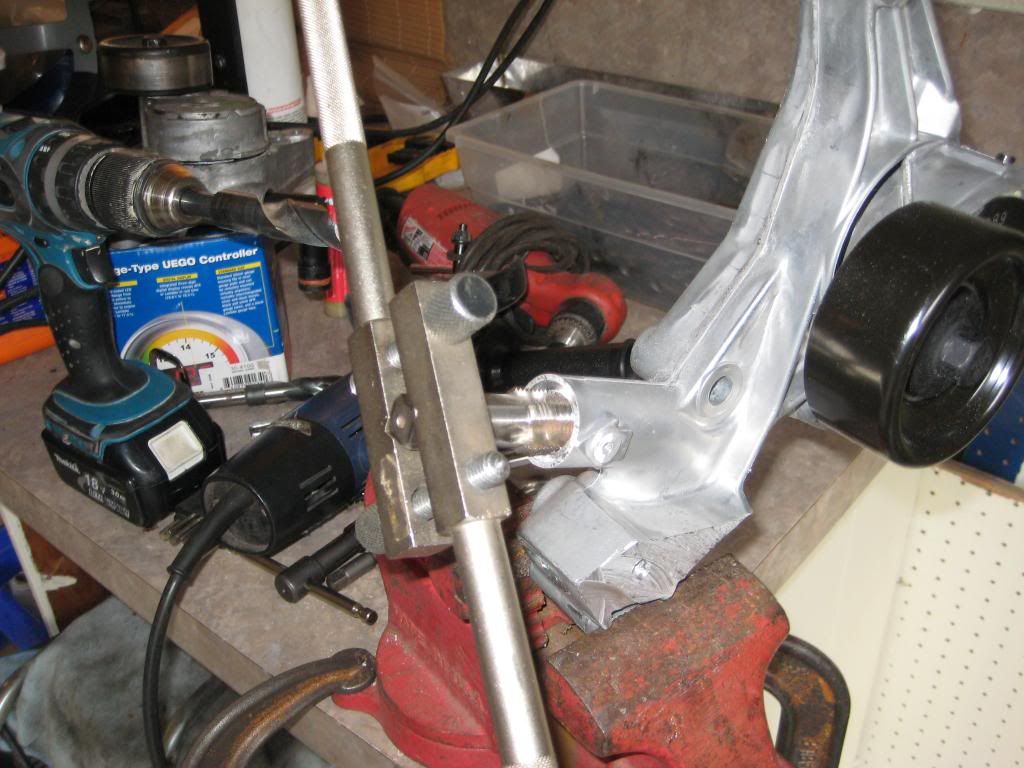
Silly camera focusing perfectly on my messy workbench.
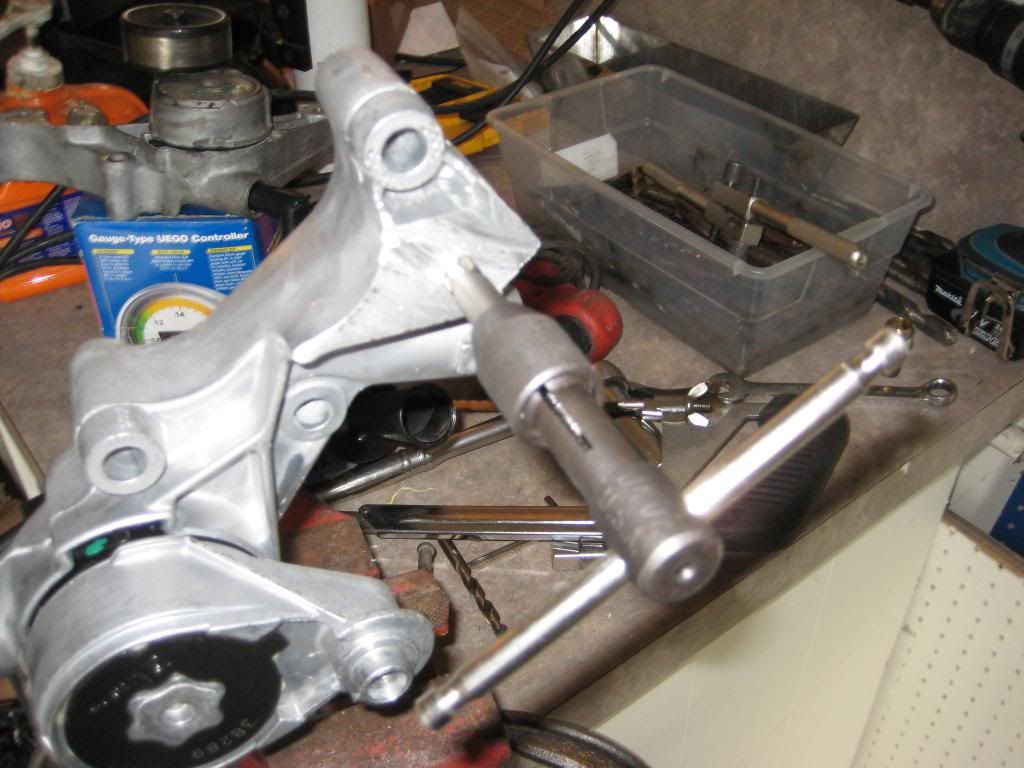
Installed:
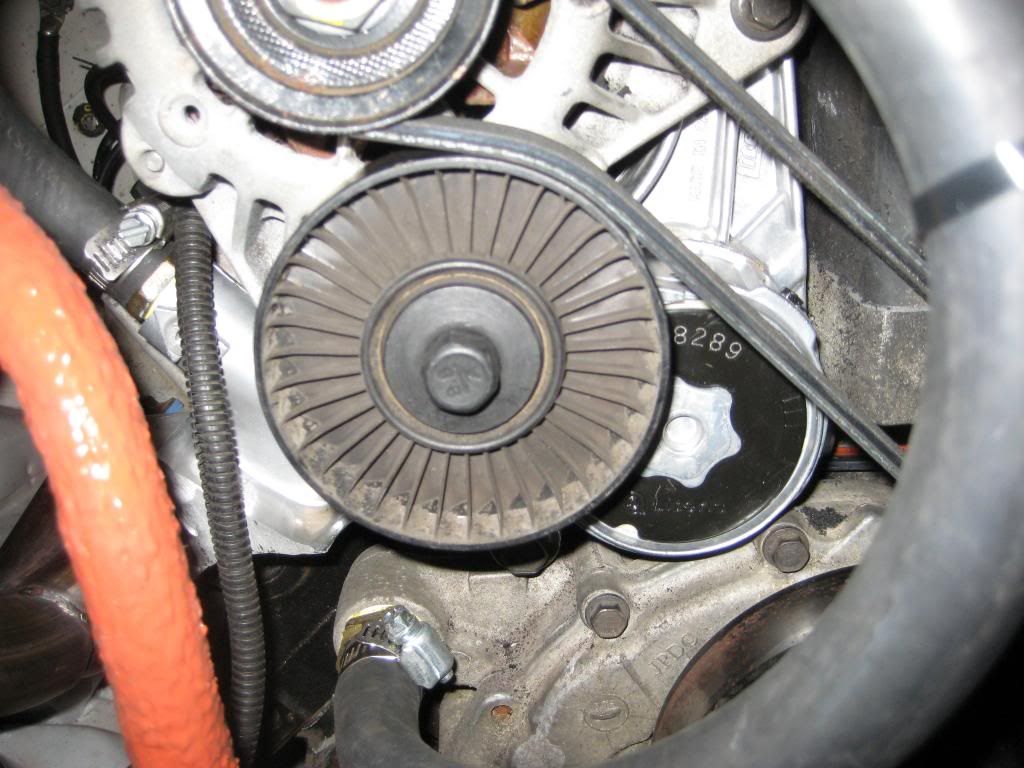
That was all fine except that it did nothing to solve the belt throwing problem that has plauged me for a year with this car!!! 
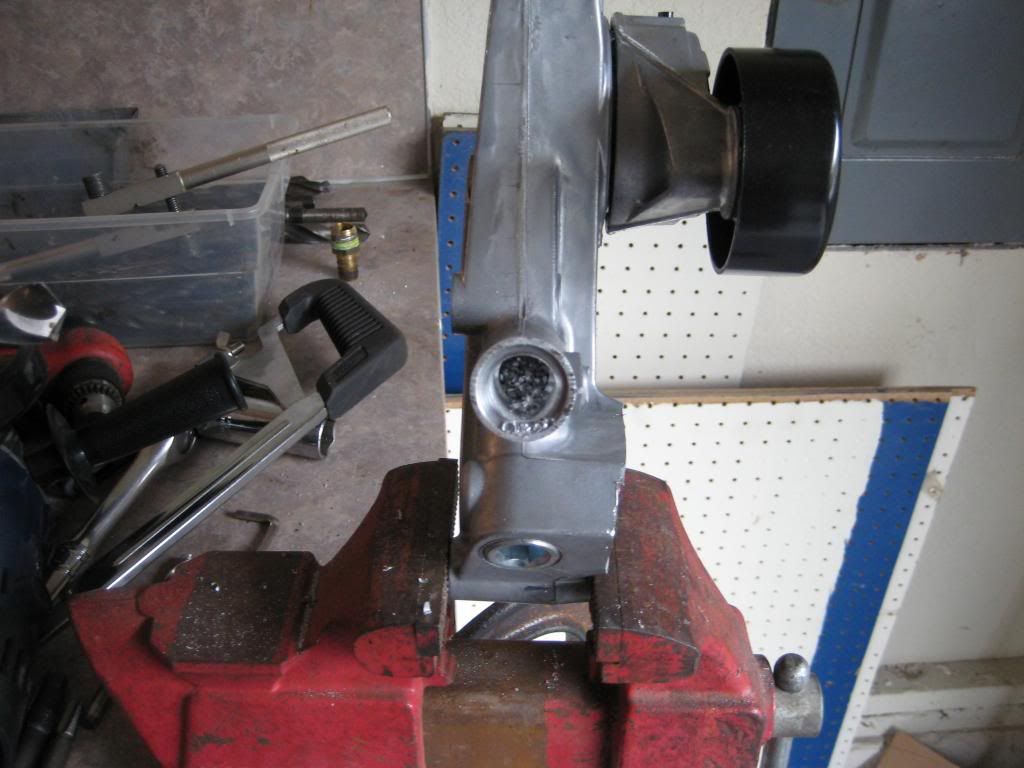
After some head scratching and repeated removal of the alternator I realized that GM used a rear brace on it that I was lacking. Fortunatly I have boxes of 3800 parts from my many engines, so I dug one out and threw it on:
Bafflingly that made the problem worse. Now just cranking it over was enough to throw the belt.
After some choice words and several removals of the alternator, bracket, and tensioner to take measurements I noticed that the rear alternator bracket has a slotted adjustment on it. I had left it alone based on my
"it came off a running car" theory, but lacking any better ideas I loosened the bolts and cranked it as far back as it would go:
I then installed the alternator loosely and used the bolt through the rear bracket to draw it back. This put it square with the tensioner, and seems to have solved the belt problems. I am worried it may still be an issue at high RPM or on throttle snap, but it is hard to get the car to do either at this point because of the tip-in bog.
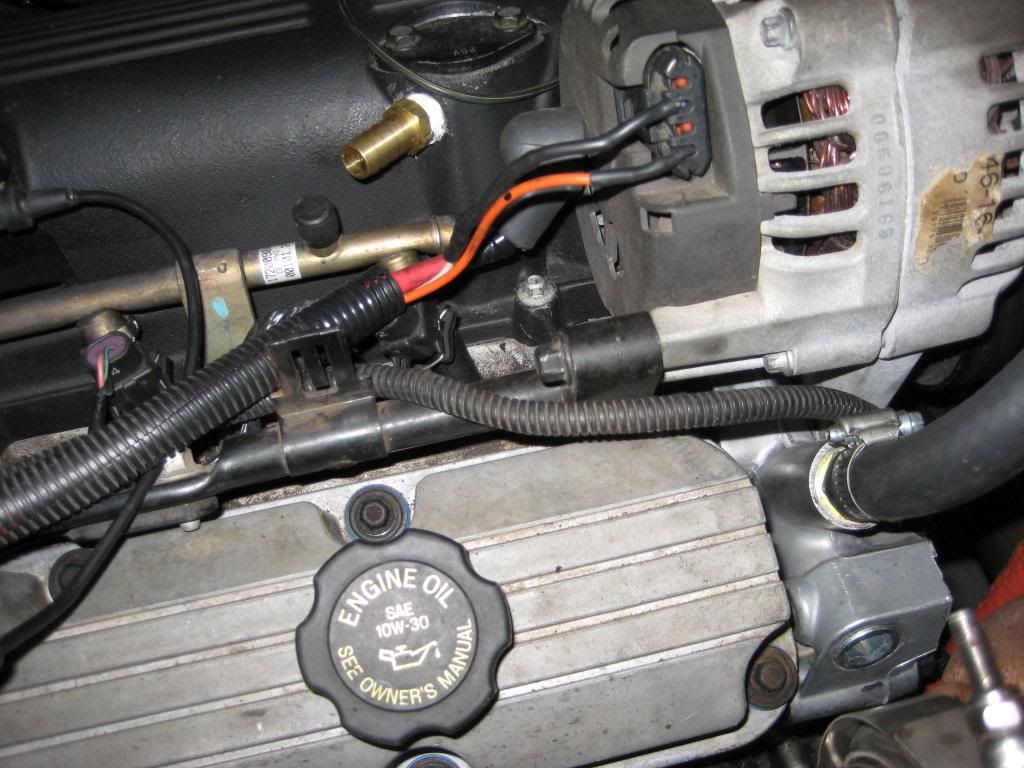
I also completed a bunch more wiring, which sounds boring... because it is boring!
The headlight harness and fan harness are both in. I ran wire for the line lock, fuel pressure gauge, windshield washer, brake fluid warning light, wideband sensor, and a bunch of other stuff. I also threw the front blinkers, low beams and windshield wipers on it for that nice street-legal look.
Next on the list:
-Power steering line from fourthgen is too long and loops too close to headers. Need to find a shorter one at the yard or have a hydraulic shop build a new one.
-Power steering reservoir bracket doesn't want to fit anywhere. Need to build something or replace reservoir with B-body unit.
-Need to find a proper V8 fan shroud (John's fault) so I can hack it up to mount this fancy two-speed Taurus fan.
-Install headlight relay harness and finish headlight wiring.
-  Paint Paint |
|
| Back to top |
|
|
chevymad
Master B
Joined: 11 Jan 2004
Posts: 5474
1987 Pontiac Formula
|
| Posted: Sun Aug 11, 2013 9:16 pm Post subject: |
|
|
| Ahh, the water cooled idler pulley bracket. Makes complete sense. |
|
| Back to top |
|
|
aaron_sK
Member
Joined: 23 Jan 2006
Posts: 8834
Location: Back in beautiful Tacompton
1987 Chevrolet Camaro IROC-Z
|
| Posted: Sun Aug 11, 2013 9:21 pm Post subject: |
|
|
| GM's "what do we got on the shelf" engineering at it's finest. |
|
| Back to top |
|
|
Twilightoptics
Hardcore (12sec Club)

Joined: 13 Jan 2004
Posts: 9191
Location: Auburn , WA
1987 Chevrolet Camaro IROC-Z
|
| Posted: Mon Aug 12, 2013 5:09 pm Post subject: |
|
|
Cripes did you move again?
_________________
A redline a day keeps the carbon away! |
|
| Back to top |
|
|
aaron_sK
Member
Joined: 23 Jan 2006
Posts: 8834
Location: Back in beautiful Tacompton
1987 Chevrolet Camaro IROC-Z
|
| Posted: Mon Aug 12, 2013 5:17 pm Post subject: |
|
|
| Yup! 12 month lease. |
|
| Back to top |
|
|
Twilightoptics
Hardcore (12sec Club)
Joined: 13 Jan 2004
Posts: 9191
Location: Auburn , WA
1987 Chevrolet Camaro IROC-Z
|
| Posted: Mon Aug 12, 2013 8:08 pm Post subject: |
|
|
Mountain man on the run!
_________________
A redline a day keeps the carbon away! |
|
| Back to top |
|
|
RSFreak
The other "John"

Joined: 23 Jan 2004
Posts: 2946
Location: Renton
1989 Chevrolet Camaro RS
|
| Posted: Sat Aug 17, 2013 11:07 pm Post subject: |
|
|
You re-key it yet?!
_________________
'86 Trans Am - 5.0L TPI - LT1 cam - 700R4 - WS6
'85 Camaro Berlinetta - IROC clone
 |
|
| Back to top |
|
|
BigDaddyVu
12sec Club

Joined: 31 Jan 2004
Posts: 1118
Location: Spokane, Wa
1986 Chevrolet Camaro Z/28
|
| Posted: Wed Aug 21, 2013 7:02 pm Post subject: |
|
|
Someone on here finally making a turbo f-body
_________________
 |
|
| Back to top |
|
|
|