| View previous topic :: View next topic |
| Author |
Message |
BluFbdy
Member
Joined: 16 Jul 2010
Posts: 915
Location: Port Orchard WA
1989 Chevrolet Camaro RS
|
 Posted: Sun Feb 19, 2012 9:02 pm Post subject: Wanted to share my recent side project (pic heavy) Posted: Sun Feb 19, 2012 9:02 pm Post subject: Wanted to share my recent side project (pic heavy) |
 |
|
So I got bored at work one day and decided to dive into fiberglassing a box for my car, its a bit oversized for my current subs but thinking long term I spec'd it for W3's I'm just going to crank up the power and add some jute material to the inside yo make up for the air space difference any way here's some pictures it hasn't gone half bad for my first fiberglass box
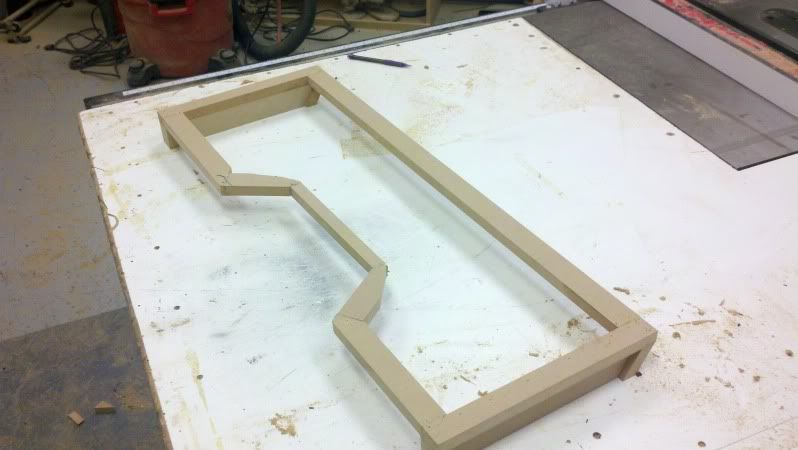
This is the frame I started with, just made it from scratch as I went
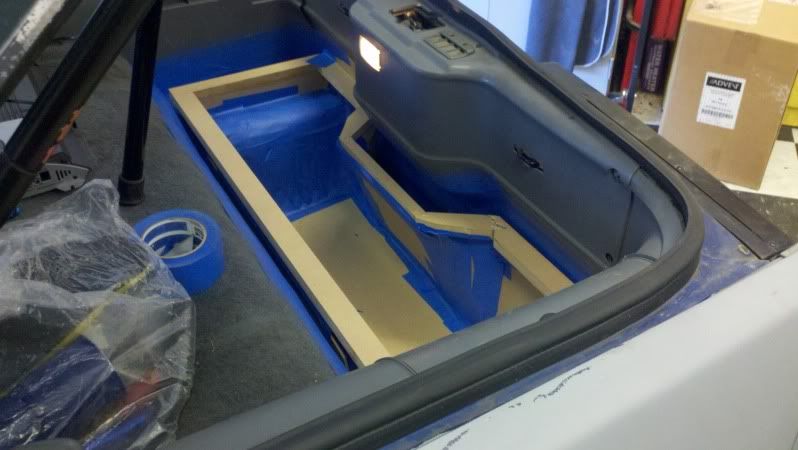
Here's the frame in the car, the entire well was lined with blue tape so I could mold it to the carpet, the rear around the hatch bulge was built with cardboard and tape, attaching to a piece of 3/4 Mdf in the bottom of the well
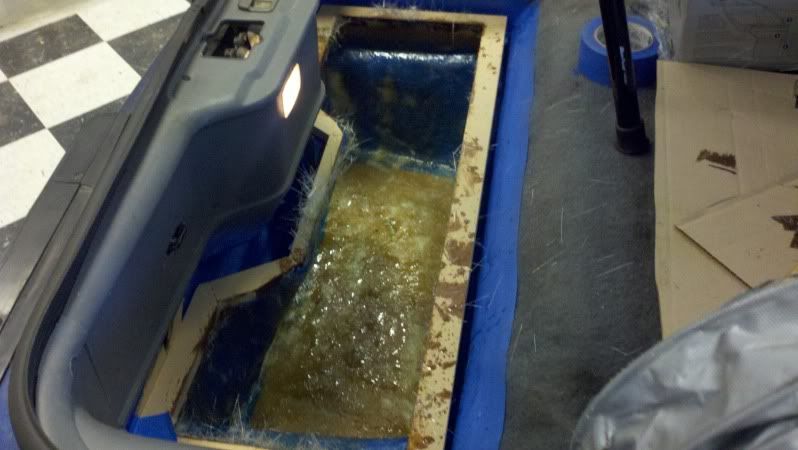
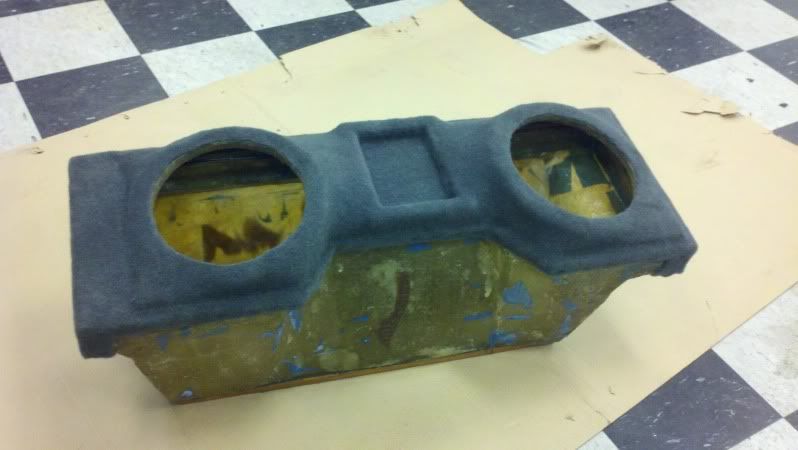
First layer of fiberglass, a second one was laid over it to make it rigid enough to remove from the car
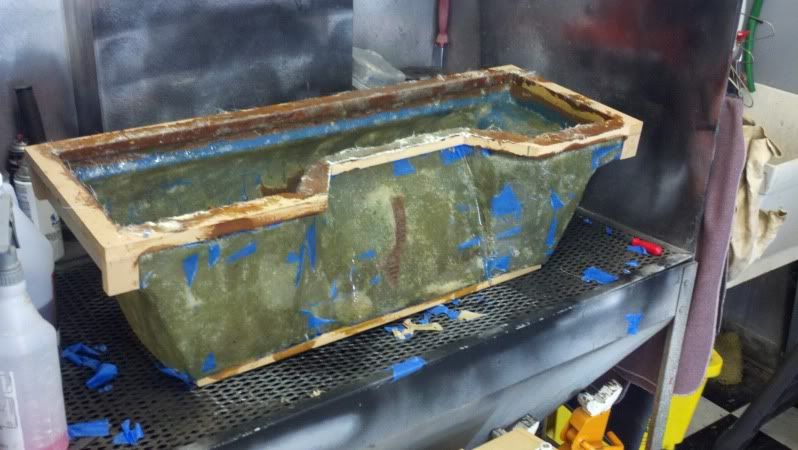
Here is the rough base, took a bit of work to remove it but it came out perfectly
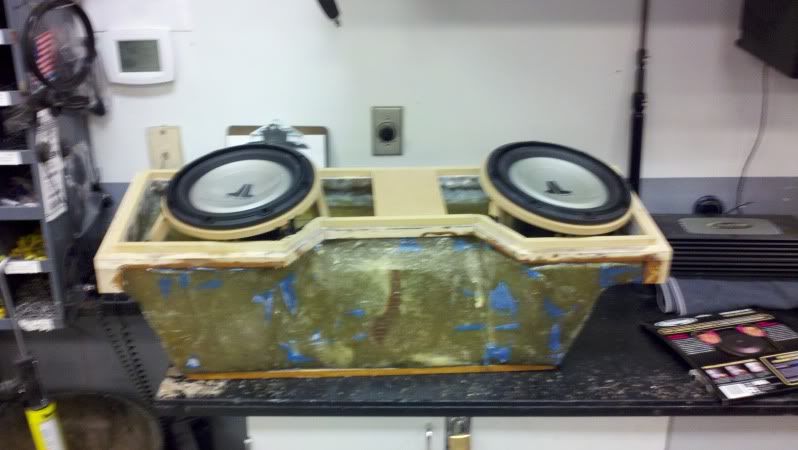
Outside of the box got another coat of resin to waterproof it, and both rings were mounted at the exact same angle (1st one took about 10 mins, 2nd one took about 2 hours to match it lol the center board was the base for my Plexiglas LED spot
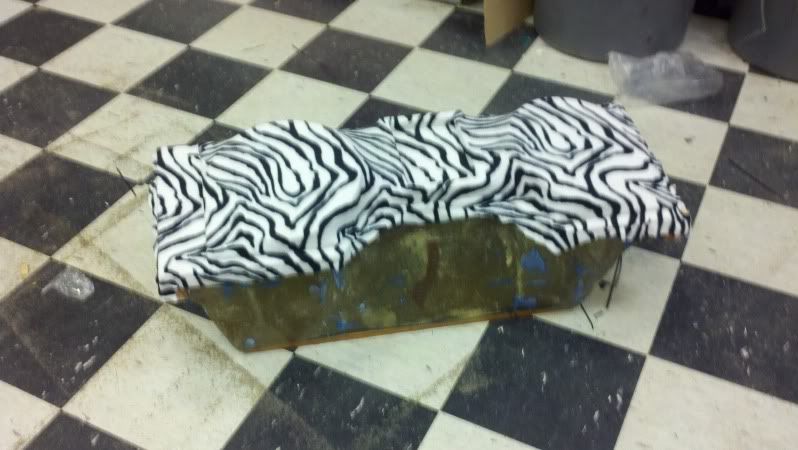
Stretched with zebra fleece and stapled down to get the shape of the top
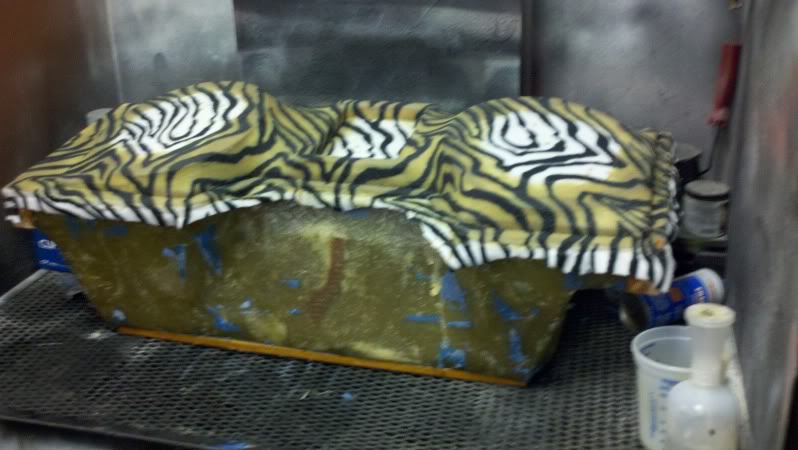
Nice thick coat of resin on the fleece to harden it (still need to do a layer of glass on the inside the fleece didn't take to the resin in all spots so its a tad weak but still has its form)
And this is where I'm at now, sub holes cut out and all stilts removed, just need that final layer inside and the box itself is done.
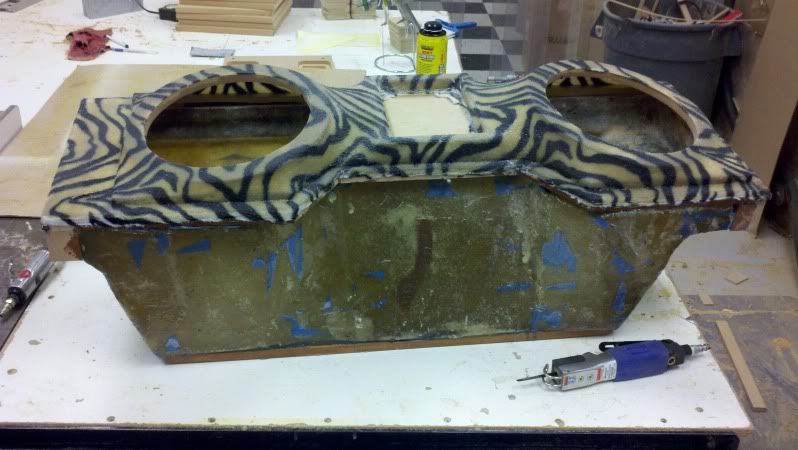
If you notice around the entire box I made a 3/4" border so I can cut a trim piece to flush it into the trunk. The center spot is getting the resin soaked fleece cut/ sanded out, a clean piece of zebra fleece will be glued in and a piece of Plexiglas will be mounted on top of it spaced 1/2" up, blank for now until I decide what I want to put on the Plexiglas. LEDs will be tied to the trunk light so its not on all the time. Overall I'm happy with the results, it will sit low enough for me to use my t top bag once again and it will be sealed for great bass response.
Thoughts? Opinions?
_________________
If you expect a kick to the balls and get a slap to the face its still a victory
 |
|
| Back to top |
|
 |
Al Hasse
Member

Joined: 19 Nov 2005
Posts: 4379
Location: Bremerton, WA
1992 Chevrolet Camaro RS
|
| Posted: Sun Feb 19, 2012 9:24 pm Post subject: |
|
|
That's going to look nice. Gotta be nice to work on your own projects at work when business is slow 
_________________
92 Camaro
89 Camaro
 |
|
| Back to top |
|
|
iansane
Member

Joined: 16 Jan 2004
Posts: 5740
Location: Bothell
1991 Pontiac Trans Am
|
| Posted: Sun Feb 19, 2012 9:31 pm Post subject: |
|
|
That's kind of cool. Not sure I dig the zebra but it's your stuff.  Where do you work? Where do you work?
_________________
| Quote: | | Sometimes I actually think I'm slightly retarded in the mouth. |
|
|
| Back to top |
|
|
BluFbdy
Member
Joined: 16 Jul 2010
Posts: 915
Location: Port Orchard WA
1989 Chevrolet Camaro RS
|
| Posted: Sun Feb 19, 2012 9:35 pm Post subject: |
|
|
Yeah I don't really eat on my lunch breaks so I just started doing this lol
The zebra was on sale at Jo Ann's and it ended up looking kinda cool after stretching it, the plan is to find something I want on the Plexiglas and get a decal printed with the adhesive on the face, spray it black and remove the decal so its illuminated by the LEDs the zebra on the inside will reflect the blue really well so I figured I'd use my scraps
I work at cartoys in silverdale currently
_________________
If you expect a kick to the balls and get a slap to the face its still a victory
|
|
| Back to top |
|
|
aaron_sK
Member
Joined: 23 Jan 2006
Posts: 8834
Location: Back in beautiful Tacompton
1987 Chevrolet Camaro IROC-Z
|
| Posted: Sun Feb 19, 2012 11:27 pm Post subject: |
|
|
Dude... that Zebra bit is the sh*t!
You should have your whole interior done up with zebra inserts then park next to Al with the plush purple interior. It'd be some pimpin' in the parking lot.
 |
|
| Back to top |
|
|
Al Hasse
Member
Joined: 19 Nov 2005
Posts: 4379
Location: Bremerton, WA
1992 Chevrolet Camaro RS
|
| Posted: Sun Feb 19, 2012 11:30 pm Post subject: |
|
|
| aaron_sK wrote: | Dude... that Zebra bit is the sh*t!
You should have your whole interior done up with zebra inserts then park next to Al with the plush purple interior. It'd be some pimpin' in the parking lot.
|
 |
|
| Back to top |
|
|
BluFbdy
Member
Joined: 16 Jul 2010
Posts: 915
Location: Port Orchard WA
1989 Chevrolet Camaro RS
|
| Posted: Sun Feb 19, 2012 11:40 pm Post subject: |
|
|
It would have to be some sweet zebra suede lol the fleece is gonna be covered with carpet its just used to get your top shape, coulda gone with cheetah print we had at the shop (idk why but everyone just juys the most random fleece they can find) the only visible zebra will be below the Plexiglas and when its painted only a few people will catch it, just a touch to be different, although I haven't really seen any other fiberglass boxes like mine so 2 points for originality I guess lol my commerical guy came in back when I was stretching it and when he saw it all he said was "my god...the 70's vomited all over your box....I like it"
I was honestly surprised how its turned out I have limited experience with fiberglass and I don't know as many cheater tricks like veteran installers but even my install manager liked the idea of the trim border, I pretty much just made everything up on the fly.
Btw word to the wise fiberglass strands hurt like hell when you run your hand across them totally sliced my finger open looking for rouge fibers between my layers lol
_________________
If you expect a kick to the balls and get a slap to the face its still a victory
|
|
| Back to top |
|
|
blue89
Member

Joined: 23 May 2006
Posts: 3482
Location: Bellingham/Eugene
1986 Chevrolet Camaro RS
|
| Posted: Tue Feb 21, 2012 9:41 am Post subject: |
|
|
I did a box very similar to this but i extended it to an amp rack by the seats and did four twelves. Pounded like none other. Even hopped the wipers. I will see if i have a pic somewhere. Your work is looking good. I did mine all glass aside from speaker rings but your trim top looks like a good idea.
Edit. Found it.

_________________
E30
86 RS - 7.4L V8 SOLD
89 RS - 3.25L V6 REMOVED
89 RS - 5.7L LT1 SOLD
|
|
| Back to top |
|
|
BluFbdy
Member
Joined: 16 Jul 2010
Posts: 915
Location: Port Orchard WA
1989 Chevrolet Camaro RS
|
| Posted: Tue Feb 21, 2012 8:07 pm Post subject: |
|
|
Holy crap I would not go 4 12s lol I'm content with 10s but that looks amazing, on going to ditch my amps soon and get 2 alpines for under the seats, then take my amps and do a hand me down to my wife's car lol
_________________
If you expect a kick to the balls and get a slap to the face its still a victory
|
|
| Back to top |
|
|
blue89
Member
Joined: 23 May 2006
Posts: 3482
Location: Bellingham/Eugene
1986 Chevrolet Camaro RS
|
| Posted: Tue Feb 21, 2012 8:57 pm Post subject: |
|
|
I glassed all the way from the bottom (like you did) all the way to the upper lip. Once it was hard I trimmed it back, put the amp racks and speaker trims in, and then fleeced over all of it. Only way to get four twelves is to overlap them in the middle.
Are you going to vinyl or paint finish yours? |
|
| Back to top |
|
|
BluFbdy
Member
Joined: 16 Jul 2010
Posts: 915
Location: Port Orchard WA
1989 Chevrolet Camaro RS
|
| Posted: Tue Feb 21, 2012 9:24 pm Post subject: |
|
|
Amp rack for 2 HD series? And are those old school w3's or w0s?
_________________
If you expect a kick to the balls and get a slap to the face its still a victory
|
|
| Back to top |
|
|
RSFreak
The other "John"

Joined: 23 Jan 2004
Posts: 2946
Location: Renton
1989 Chevrolet Camaro RS
|
| Posted: Tue Feb 21, 2012 10:36 pm Post subject: |
|
|
| aaron_sK wrote: | Dude... that Zebra bit is the sh*t!
|
I was thinking it was a great build until I saw the zebra. 
_________________
'86 Trans Am - 5.0L TPI - LT1 cam - 700R4 - WS6
'85 Camaro Berlinetta - IROC clone
 |
|
| Back to top |
|
|
BluFbdy
Member
Joined: 16 Jul 2010
Posts: 915
Location: Port Orchard WA
1989 Chevrolet Camaro RS
|
| Posted: Tue Feb 21, 2012 10:57 pm Post subject: |
|
|
The zebra will be gone lol covered grey carpet. Its just fleece used to obtain the shape, hell I could have gone with neon purple cheetah print
_________________
If you expect a kick to the balls and get a slap to the face its still a victory
|
|
| Back to top |
|
|
BluFbdy
Member
Joined: 16 Jul 2010
Posts: 915
Location: Port Orchard WA
1989 Chevrolet Camaro RS
|
| Posted: Thu Feb 23, 2012 2:51 am Post subject: |
|
|
Here's the box part all finished, sliced my hand abd managed to get blood all alone the front seam before realizing, damn razor blades cut too well, any way its all carpeted up next step is to build my fasad and carpet it good thing that's the easiest part
_________________
If you expect a kick to the balls and get a slap to the face its still a victory
|
|
| Back to top |
|
|
blue89
Member
Joined: 23 May 2006
Posts: 3482
Location: Bellingham/Eugene
1986 Chevrolet Camaro RS
|
| Posted: Thu Feb 23, 2012 8:37 am Post subject: |
|
|
| Turned out good! Especially for your first box. Not gonna lie though, i liked the zebra. Once you get it powered you will find out how well you did your seams. |
|
| Back to top |
|
|
RSFreak
The other "John"
Joined: 23 Jan 2004
Posts: 2946
Location: Renton
1989 Chevrolet Camaro RS
|
| Posted: Thu Feb 23, 2012 12:23 pm Post subject: |
|
|
| My first box turned out awesome too, but I made it out of 1/2 particle board so it was extremely heavy and fell apart the first time the hatch leaked! |
|
| Back to top |
|
|
iansane
Member
Joined: 16 Jan 2004
Posts: 5740
Location: Bothell
1991 Pontiac Trans Am
|
| Posted: Thu Feb 23, 2012 12:25 pm Post subject: |
|
|
That looks really good after carpet. Are all you interior panels carpeted too?
_________________
| Quote: | | Sometimes I actually think I'm slightly retarded in the mouth. |
|
|
| Back to top |
|
|
jchaussee
Member
Joined: 14 Nov 2010
Posts: 1318
Location: renton
|
| Posted: Thu Feb 23, 2012 1:04 pm Post subject: |
|
|
| What are the tricks to make carpet mold that well?? |
|
| Back to top |
|
|
Al Hasse
Member
Joined: 19 Nov 2005
Posts: 4379
Location: Bremerton, WA
1992 Chevrolet Camaro RS
|
| Posted: Thu Feb 23, 2012 1:26 pm Post subject: |
|
|
| If he's using what I think he is, that is a stretchy carpet made for speakers and boxes, you can get similar stuff at Jo Ann's. Lots of adhesive on the box and back side of the carpet, let dry, then CAREFULLY apply carpet to box. |
|
| Back to top |
|
|
BluFbdy
Member
Joined: 16 Jul 2010
Posts: 915
Location: Port Orchard WA
1989 Chevrolet Camaro RS
|
| Posted: Thu Feb 23, 2012 1:44 pm Post subject: |
|
|
It sounded pretty good with the w1s, didn't get a whole lot of time to play with it all that much before leaving work
As fast as the carpet goes we call it super stretch, spray your adhesive on the boxand the carpet let them dry like al said the lay your first spot, in this case it was the led box, stretch it into all corners of that little box, stretch up the walls,then stretch down the front and back of the box, and finally to the ends, you have to stretch as hard as you can and use something.to shove the carpet in all the corners, it takes alot of yanking on the carpet and smoothing but it comes out create, on a fiberglass box its your only real option but I do it to all my wood boxes too, I'm not a fan of seams they like to come undone
_________________
If you expect a kick to the balls and get a slap to the face its still a victory
|
|
| Back to top |
|
|
|